
The Art and Engineering of Screw-Making for Firearms: Thread Pitch, Precision Fit, Timing, Finishing, and Using Reference Tools

Updated: 4 days ago
Quick answer: a firearm screw is a precision part, not hardware. Four things define it, and all four have to be right: thread pitch, fit class, slot geometry, and length. Get one wrong and the screw either strips, backs out under recoil, or chews its own slot the first time a driver touches it. We cut to Class 3 fit, we time the slots so they all point the same way, and on an original screw we repair rather than replace.
Most of the screws that reach our bench are not broken. They are mangled, by a driver that did not fit, on a gun that somebody cared about. That is a repair job, not a parts job, and the difference matters most on the guns that cannot be re-parted at all.
For gunsmiths handling worn screws during restorations or custom builds, the sections on repair and aesthetic restoration will provide advanced techniques to help you bring screws back to their factory-new condition.

Essential Tools for Precision Firearm Screw Making and Repair
To achieve professional results in firearm screw making and repair, the following tools are essential:
Lathe: For precision thread and diameter cutting, ensuring accurate fit.
Micrometer: Allows ultra-precise measurements down to 0.0001 inches, critical for pitch diameter verification.
Caliper: Provides quick measurements of the outer diameter (OD) and hole diameters in firearms.
Thread Pitch Gauge: Essential for identifying and verifying imperial and metric threads.

Screw Slot File: Designed for creating precise, uniform slots; critical for aesthetics and functionality.

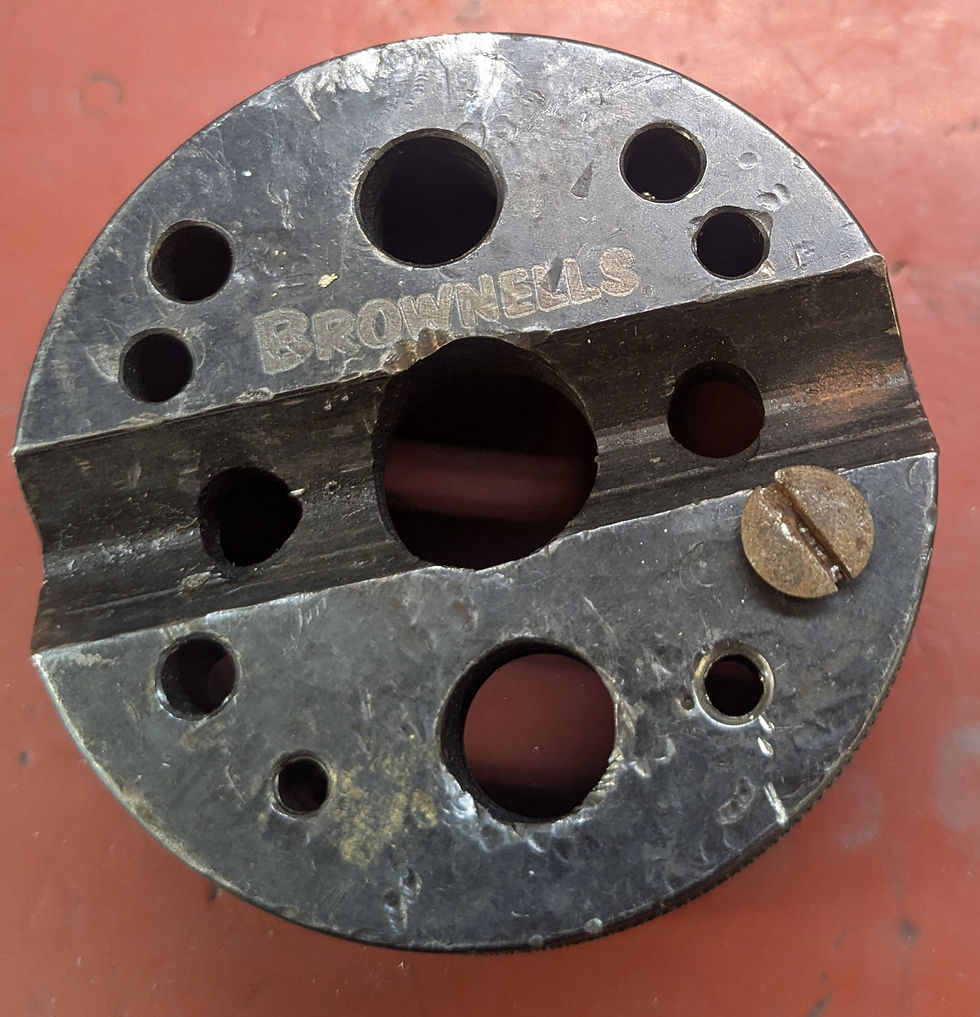
Brownells Screw Checker: A tool for quickly checking common screw sizes and pitches in firearms.

Machinery’s Handbook: The go-to reference for unified screw threads, tolerances, and fit classes.

Thread Pitch and Fit Class: Why Class 3 Wins on a Firearm
Imperial and Metric, Read the Same Way
In American-made firearms, thread pitch is often measured in threads per inch (TPI). For instance, a 1/4"-28 screw has a 0.25-inch diameter and 28 threads per inch. Metric threads are measured by the distance between threads in millimeters, like an M6 x 1.0 screw, which has a 6mm diameter with 1mm spacing between threads.
Fit Class Is What Decides Whether It Stays Tight
Loose Fit (Class 1): Rarely used in gunsmithing, as it allows for too much play and can loosen under vibration.
Standard Fit (Class 2): Ideal for general-purpose threading; sufficient for non-critical components.
Precision Fit (Class 3): Preferred for firearms, as it offers a tight, vibration-resistant engagement critical for scope mounts, action screws, or other high-stress components.

How We Hold a Screw While We Work On It
We are not going in depth on how to cut a thread on a lathe with this post, but we will show some fixtures and blanks screw kits we use.
Screw Holders
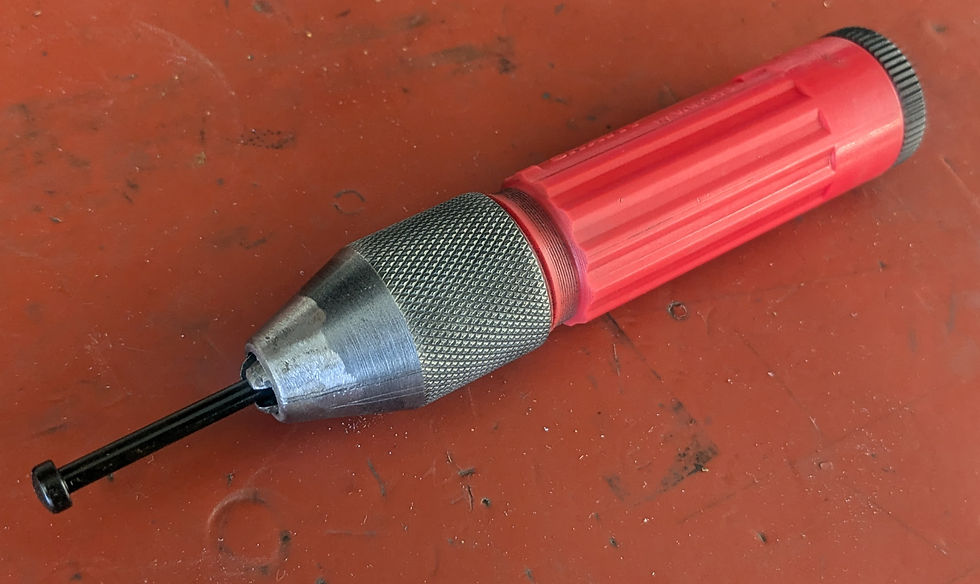
A Shop Made Threading Fixture
Timing a Screw So Every Slot Lines Up
Aligning screw slots adds to the firearm’s professionalism and aesthetic. Here’s how to achieve it:

Mark the Pre-Fit Position: Insert the screw, marking the slot position before fully tightening.
Adjust Screw Length: File the underside of the screw head incrementally until the slot aligns perfectly.
Use Shims if Necessary: Shims under the screw head can prevent over-rotation not ideal.
Secure Final Fit with Loctite: Apply a small amount of blue Loctite to ensure stability without permanent bonding for most applications in firearms.
These techniques are also used to time barrels to receivers and muzzle brakes to barrels.
The Math Behind Timing
Understanding Screw Advancement per Turn
Advance per Turn: For a screw with 28 TPI (threads per inch), each complete turn advances the screw by approximately 0.0357 inches.
MATH: 1 / 28 = .0357
Advance per Degree: Since there are 360 degrees in a full turn, each degree advances the screw linearly by:
Advance per degree = 0.0357 / 360 ≈ 0.0000992
These calculations allow you to estimate how far the screw needs to rotate in degrees to align the slot precisely.
Adjusting Screw Length to Control Alignment
If the slot is slightly off alignment, carefully filing the underside of the screw head can help advance the slot to the desired position.
Calculate the Required Adjustment: Lets say the 28 TPI screw needs to turn a 1/4 turn to be aligned.
MATH: 1/4 turn = 90 degrees
Advance for 90 degrees = 90 / 360 X .0357 = .0089 inches.
Carefully remove small amounts of material from the underside of the head, checking the alignment after each adjustment. This gradual approach allows for precise timing adjustments without compromising the screw’s structural integrity.
Using Shims for Consistency
If filing down the screw head isn’t practical, shims provide a controlled way to adjust alignment. Thin shims (available in various increments) placed under the screw head can prevent it from turning too far, enabling precise slot alignment without modifying the screw itself.
Calculate Shim Thickness: For example, a 28 TPI screw and a 45-degree adjustment is needed to line up screw slot, and a full turn (360 degrees) advances the screw by 0.0357 inches:
MATH: 1 / 28 = .0357
Advance for 45 degrees: 45 / 360 = 1 / 8 = .125
Shim thickness = .125 X .0357 = .0045
Using the calculated shim thickness allows you to control the final alignment accurately.
Testing and Final Torque Application
Install the screw to its intended position and verify that the slot aligns perfectly with other screws. Apply the final torque with a screwdriver or torque wrench.
Repairing a Damaged Screw
Gunsmiths often face two primary forms of screw damage: deformed slots and stripped threads. Here’s how to restore them.
Reforming a Mushroomed Slot
One of the most common forms of damage to firearm screws is a “mushroomed” or deformed slot, usually caused by using the wrong screwdriver or excessive torque. Here’s how to repair a damaged screw slot:

Repositioning Displaced Metal:
When a slot is damaged, material is often displaced rather than removed. Using a small gunsmith’s hammer with a polished face and tap the deformed metal back into place. This technique pushes the displaced metal back into the slot area, allowing you to reform the slot rather than remove material.

Position the screw securely in a screw-holding fixture to prevent it from slipping. A vise with soft metal jaws or screw-holding jig is ideal for this, as it keeps the screw stable during repair. We have a vise that we replaced the steel hardened jaw face with copper.
Filing the Slot:
Once the displaced metal has been realigned, use a screw slot file (chosen to match the slot width and depth) to carefully re-cut the slot. Start with light, controlled strokes, keeping the file perfectly aligned with the slot orientation to avoid further deformation. Hack saw blade may fit as well.

Pay close attention to depth and width to maintain uniformity across all screws in the firearm. Check your progress frequently, and avoid over-filing, as you want to keep the slot deep enough for a proper screwdriver grip without compromising the screw’s integrity.
Polishing the Screw Head:
After restoring the slot, the head of the screw may need polishing. Place the screw in a drill chuck, securing it so that the head faces outward. Set the drill to a low speed and use progressively finer grits of sandpaper (start around 200 grit and move to 400 grit) to polish the head.


Rotate the screw at a steady speed and apply the sandpaper evenly, keeping pressure light to avoid changing the head’s shape. This method removes any small scratches or tool marks left from the repair process, giving the screw head a smooth, uniform finish.

Restoring Stripped Threads
Minor Thread Repair with a Die: Clean up stripped threads with a threading die that matches the TPI and diameter. Use cutting oil and gentle alignment to restore the thread shape.
Using Thread Inserts: For some stripped holes, especially in soft metals, a thread repair insert like a Heli-Coil can restore original dimensions.

How to Not Damage a Screw in the First Place
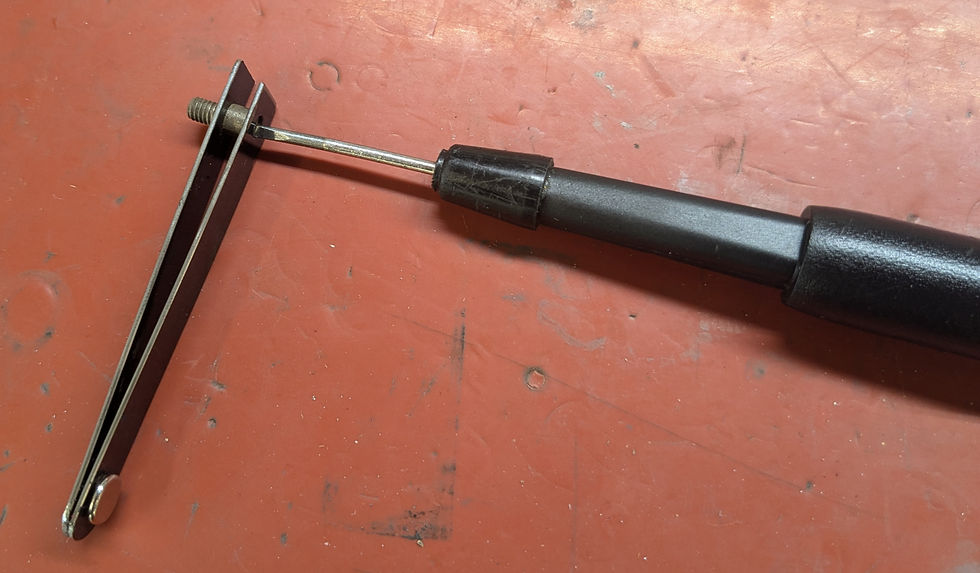
Select the Correct Screwdriver: Gunsmithing screwdrivers are precisely sized to prevent slippage. The top one is a standard flat screwdriver the bottom is a gunsmithing screwdriver that have parallel surfaces.


Tap the Screwdriver Handle: Tap when removing stubborn screws to reduce slot damage.

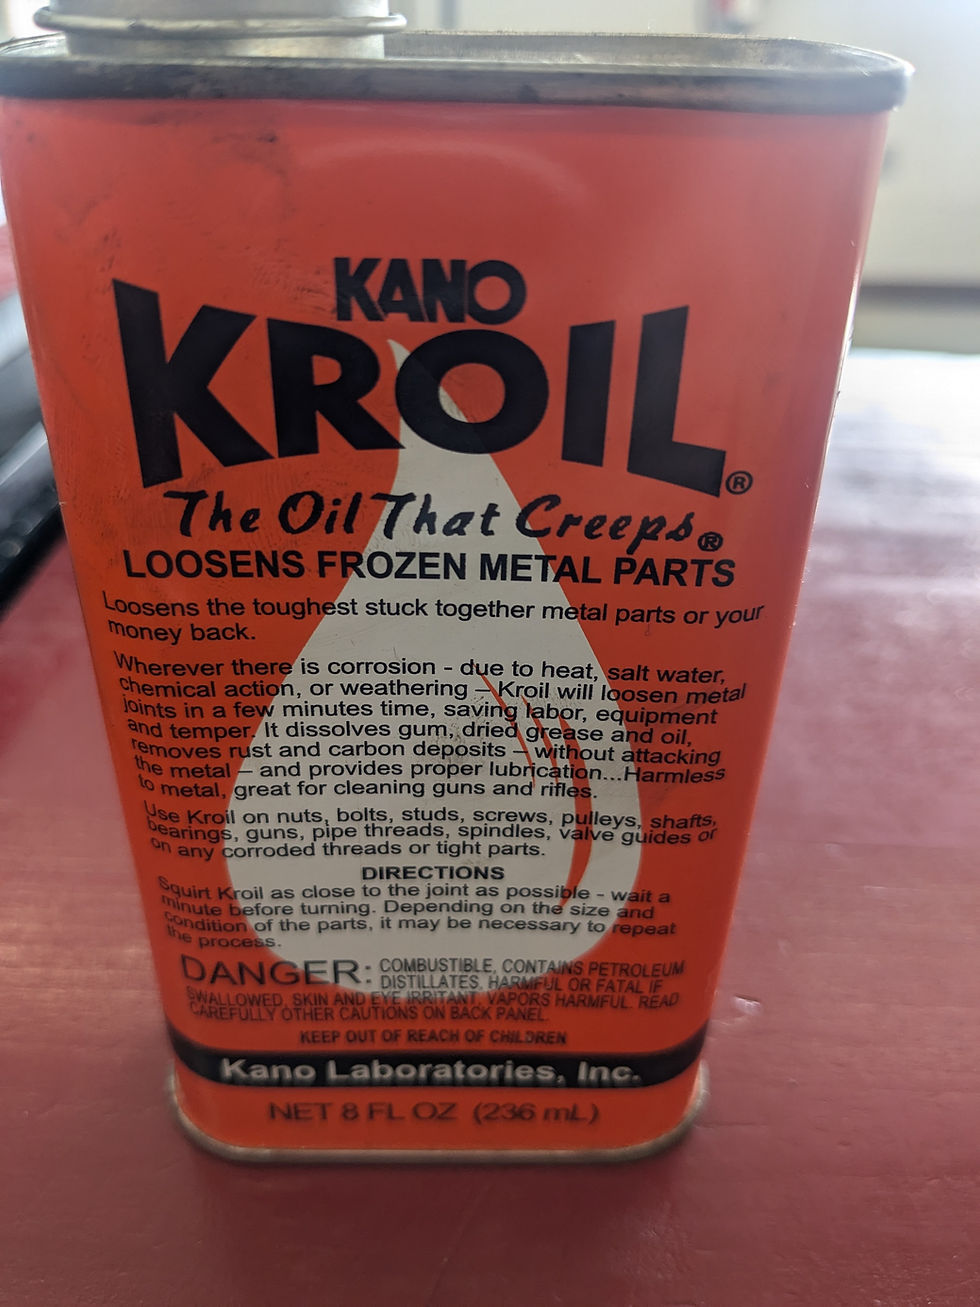
Use penetrating oils: Kroil is a good oil we use. We will let the oil soak for 10 -15 mins and sometimes over night. We have also used some heat to thin it out to get it to weep into the threads.
The Two Reference Tools Worth Owning
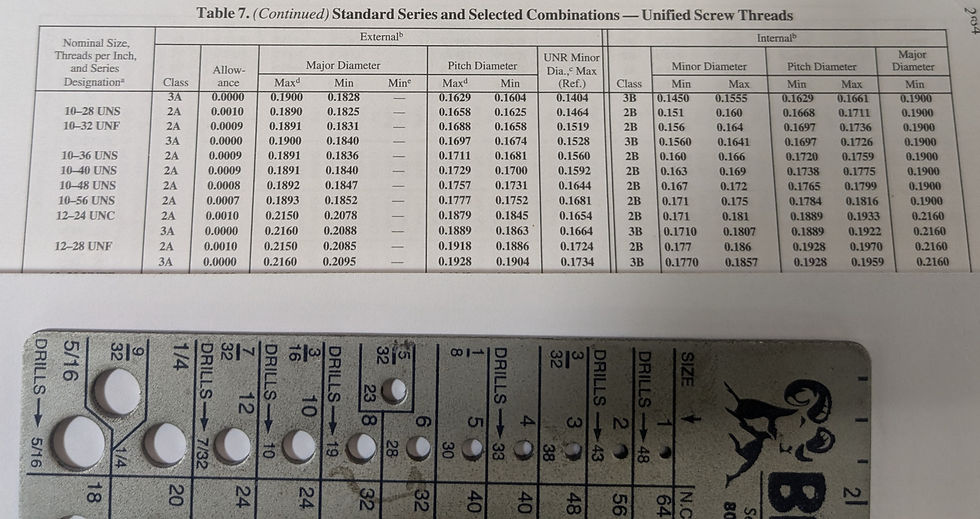
The Brownells Screw Checker helps identify screws quickly. By threading a screw into the checker’s various holes, you can match its size and pitch without guesswork, a great asset for working with unknown screws.

The Machinery’s Handbook offers tables with exact specifications, tolerances, and fit classes. For instance, a 12-28 thread specification will list the major, minor, and pitch diameters for each fit class. Gunsmiths can reference these tables to ensure screws meet industry standards, achieving consistent results across projects.
Finishing: Matching the Screw to the Gun
After repair, restore the screw’s appearance to match the firearm.
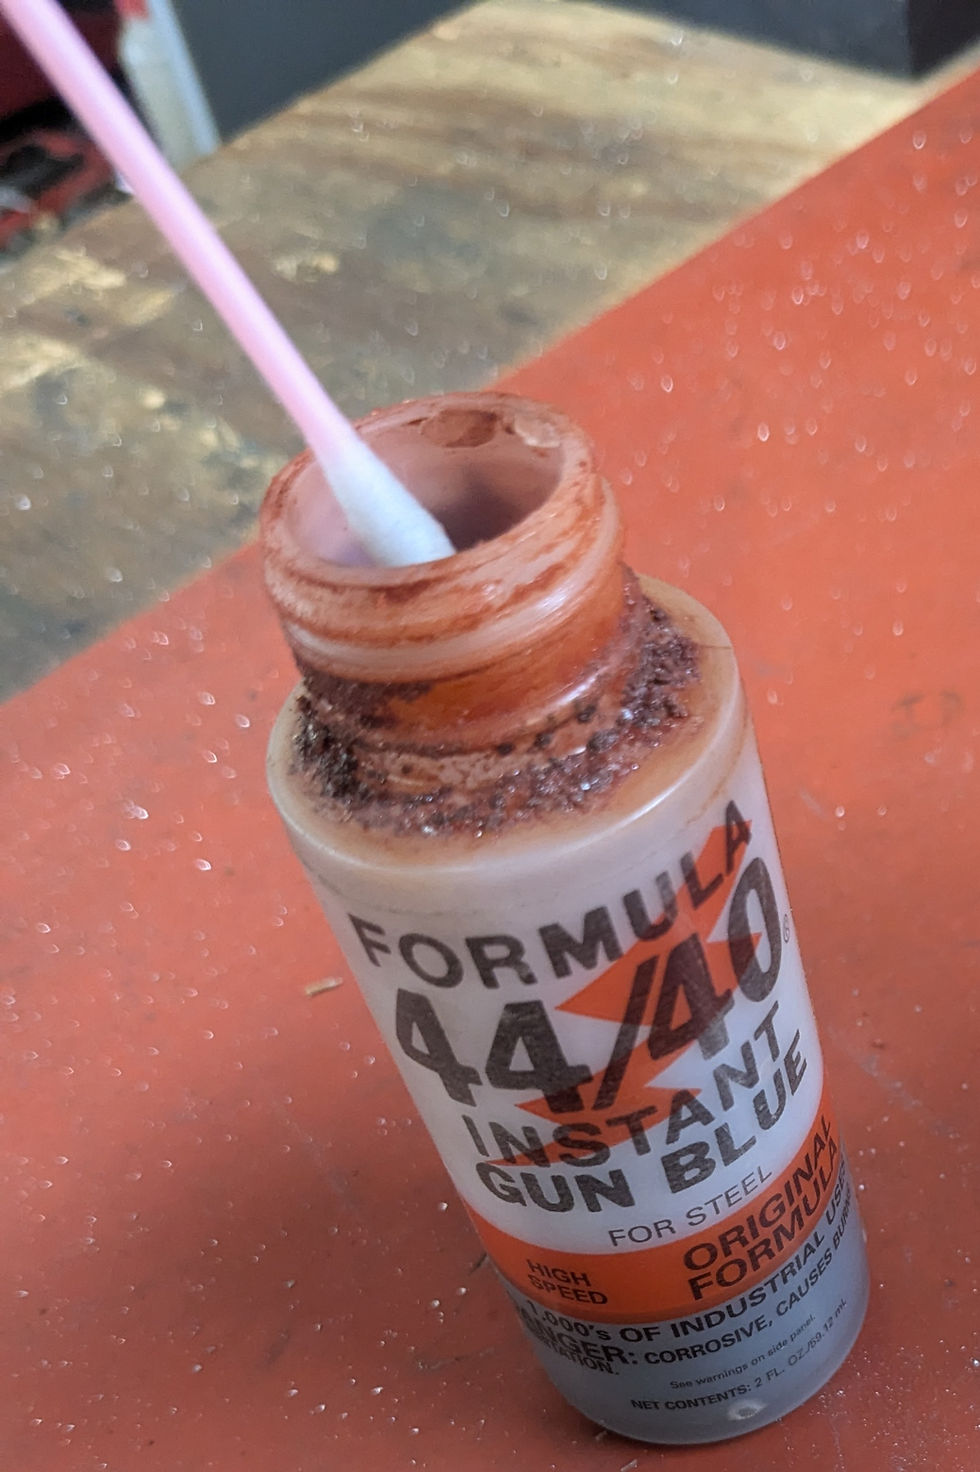
Cold Bluing: After polishing, apply cold bluing for a quick, corrosion-resistant finish. Rinse and oil for protection.
Nitriding: For a semi durable, high-end finish, consider salt bath nitriding for excellent corrosion resistance and uniform color.

Hot Salts Bluing: A more durable finishing process that produces a deep, polished blue-black color. It requires specialized equipment, but the results are resilient and visually striking, ideal for high-end firearms or restorations.
Parkerizing: A phosphate coating process that creates a matte, textured finish, ideal for firearms that require a rugged, non-reflective surface. This finish is especially popular for military or tactical-style firearms and screws, as it provides outstanding corrosion resistance.


A Five-Minute Check You Can Do Tonight
Unload the rifle and check it twice. Then pick up whichever screwdriver you normally reach for and look at the blade from the side. If the sides taper toward the tip, it only touches the top corners of the slot, and it will cam out and chew the head. A gunsmith bit is hollow ground, with parallel faces that fill the slot to the bottom.
Now look at the action screws and the base screws already on the gun. Bright metal at the edges of a slot, or a slot that is wider at the top than at the bottom, means somebody has already been in there with the wrong tool. That damage gets worse every time the screw is turned.
Neither check costs anything. Both of them tell you whether the next person to take that gun apart is going to make it worse.

Frequently Asked Questions
What thread do scope base screws use?
Most American rifles use 6-48. The heavy duty upgrade, usually cut when a 6-48 hole has been drilled out or stripped, is 8-40. Both are Unified National Special threads, which is why they do not appear in ordinary engineering fastener tables.
Why do firearms use such unusual screw sizes?
Because the industry standardized on them long before anyone was thinking about hardware store availability, and because a gun screw is chosen for the metal around it rather than for convenience. The thread has to fit a receiver wall that is often thin and sometimes blind against a barrel thread.
What is thread fit class and why does it matter?
Fit class describes how tightly the male and female threads engage. Class 1 is loose, Class 2 is general purpose, Class 3 is precision. We cut Class 3 on anything that takes recoil, because a looser class will walk under vibration no matter how well you torque it.
Why do gunsmith screwdrivers look different from normal ones?
A hardware store driver is tapered, so it only touches the top corners of the slot and cams out. A gunsmith bit is hollow ground with parallel faces, so it fills the slot to the bottom. That difference is the single biggest cause of chewed screw heads on old guns.
Can a damaged screw slot be repaired, or does the screw have to be replaced?
Usually repaired. A mushroomed slot is displaced metal, not missing metal. Tap it back with a polished hammer face, recut the slot with a screw slot file that matches the width, and polish the head. On an original screw for an old gun, repairing is nearly always the right answer.
How do you fix stripped threads?
Minor damage cleans up with a die of the correct pitch and cutting oil. A stripped hole in soft metal takes a thread insert. On a scope base, the other option is drilling and tapping up from 6-48 to 8-40, which is exactly why 8-40 exists.
What is screw timing?
Timing means the slots of every screw on the gun end up pointing the same way when the screws are fully tight. It has no mechanical function. It is the detail that tells you the person who assembled the rifle was paying attention.
How do you time a screw slot?
Two ways. File a small amount off the underside of the head so the screw turns further before it bottoms, or shim under the head so it stops sooner. Both are calculated from the thread pitch rather than guessed.
How much does filing the screw head change the alignment?
It depends entirely on pitch. A 28 TPI screw advances 0.0357 inch per full turn, so a quarter turn is 0.0089 inch. That is the amount of material you would remove to rotate the slot 90 degrees.
Do shims work for timing screws?
Yes, and they have the advantage of not modifying the screw. Calculate the fraction of a turn you need and multiply by the advance per turn. On a 28 TPI screw, a 45 degree correction is one eighth of a turn, which is about 0.0045 inch of shim.
Should I use thread locker on gun screws?
Blue thread locker on clean threads for most applications, which holds against recoil and still comes apart. Red is permanent and rarely what you want on a firearm. Remember that locker changes the friction, so the same torque produces more clamp load.
Why did my screw back out under recoil?
Three usual reasons. The threads are a loose fit class, the screw bottomed on something before it clamped anything, or the torque was set by feel and was lower than it needed to be. All three are common and all three are findable in a few minutes at a bench.
What finish should a replacement screw have?
Whatever matches the gun. Cold blue is quick and adequate on a repaired screw. Hot salt bluing is deeper and more durable. Nitriding gives excellent corrosion resistance and a uniform color. Parkerizing suits military and tactical guns where a matte, non-reflective surface is the point.
Can you make a screw for an old gun when no parts are available?
Yes. That is the reason a lathe, a thread pitch gauge and a copy of the Machinery's Handbook sit in the shop. A screw cut to the original pitch and fit class and finished to match is usually cheaper and always more correct than hunting a replacement that may not exist.
Is it worth saving an original screw?
On a collectible or an heirloom, almost always. An original screw with a repaired slot is worth more than a perfect modern replacement, and the repair is not difficult once the screw is held properly.
Do I need a thread pitch gauge and a screw checker?
If you work on more than your own rifle, yes. A screw checker identifies an unknown screw in seconds by threading it into sized holes. A pitch gauge confirms it. Together they remove the guessing that ruins threads.
Bring Us the Screw, or Bring Us the Gun
We make screws, repair slots, chase and restore threads, and finish the result to match the firearm it belongs to. On an old gun where the part does not exist to buy, that is often the only honest answer, and it is work we would rather do than watch somebody force a modern substitute into a hole it does not fit.
Call Redleg Company at 507-677-6007, or bring it in. 430 Main Avenue, Chandler, Minnesota. Monday to Friday, 9 to 5. Full service list and current pricing at www.redlegguns.com/services-offered.

Take Your Reloading to the Next Level
Ready to improve your brass prep, shrink your groups, and make your precision rifle shoot like a laser? Download the Redleg Reloading Sheets and start keeping records that tell you something.


Comments