
Elevate Your Accuracy, The Power of Epoxy Sleeving A Remington 700

Updated: 21 hours ago
Quick answer: epoxy sleeving bonds a thin layer of epoxy to the inside of the receiver's rear bridge so the bolt body runs in a surface shaped to fit it, instead of rattling in a hole cut loose at the factory. On the rifle in this article the bolt had about 0.0115 inch of play before we started. Tape on the bolt sets the clearance that stays behind, and on a hunting rifle we leave 0.004 to 0.005 inch so it still cycles cleanly.
A factory receiver is bored so that every bolt fits every receiver coming down the line. That is good manufacturing and poor precision. A bolt with ten thousandths of room does not close the same way twice, and anything that does not repeat turns up on paper sooner or later.
At Redleg Company, we take pride in building bolt-action rifles with tight tolerances for maximum accuracy. One of the specialized techniques we use is epoxy sleeving, which ensures a perfect fit between the bolt and receiver. This process improves accuracy but requires meticulous attention to detail to ensure the bolt operates smoothly after the epoxy cures.

Tools Needed for Epoxy Sleeving a Remington 700
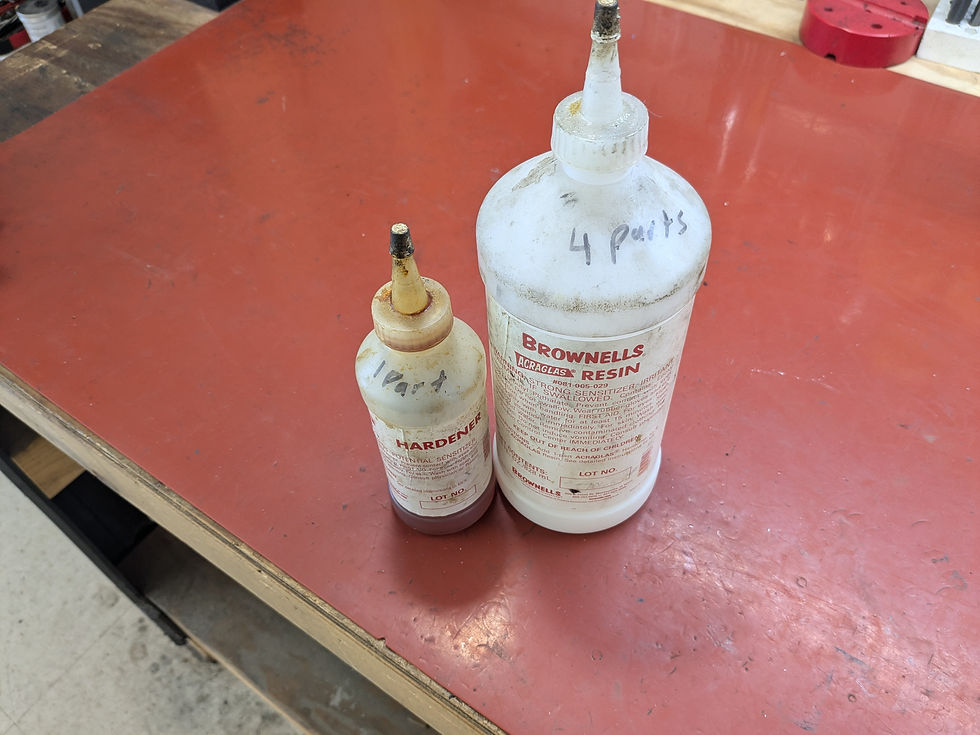
Acraglas liquid epoxy
Wax
Cotton swabs
Pipe cleaner
Micrometer or caliper
Vise
Dial indicator and magnetic base
Masking tape
Toothpicks
Sandpaper (180-220 grit) or sandblaster (150 grit aluminum oxide)
Tools to disassemble the bolt and remove the trigger
Step 1: Measure the Bolt Play Before You Decide Anything
Clean the Rifle: Thoroughly clean the rifle before starting the process.
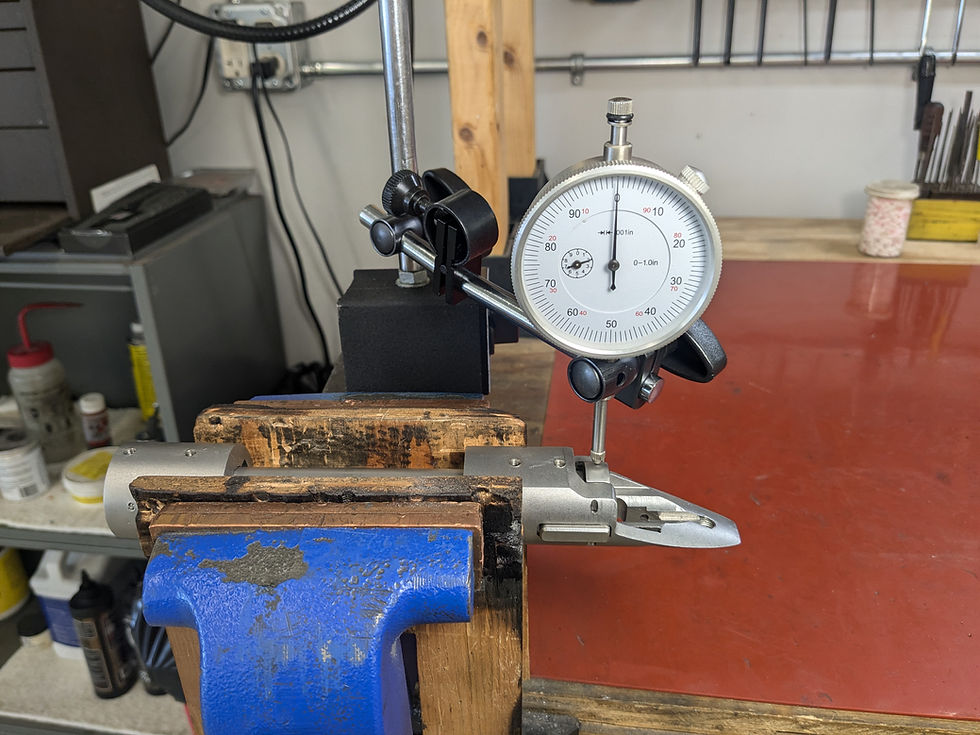
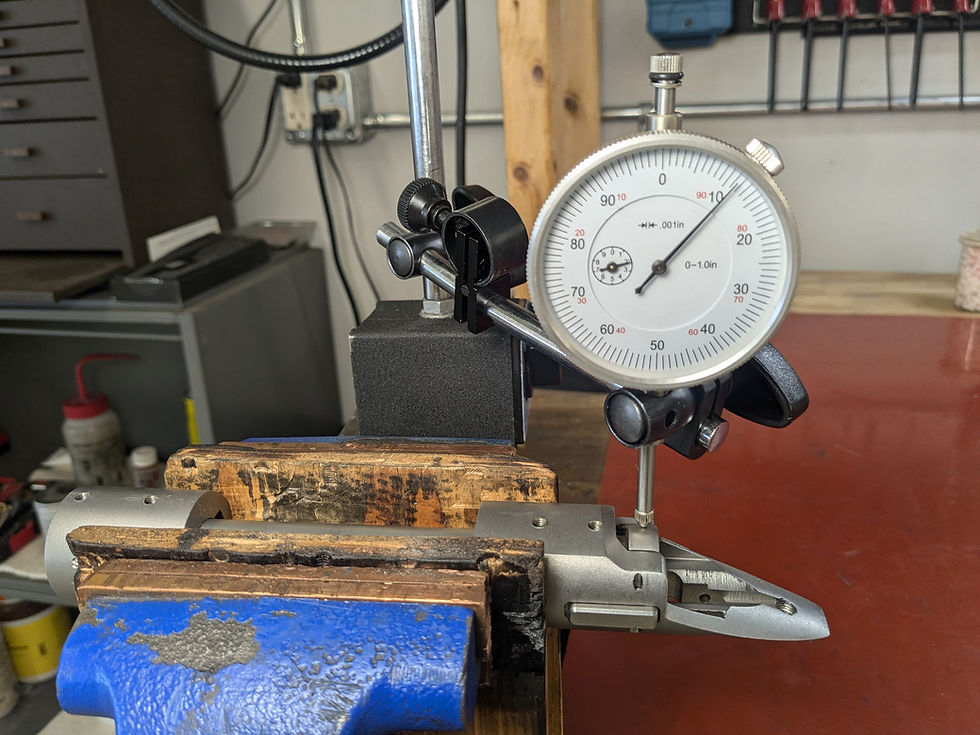
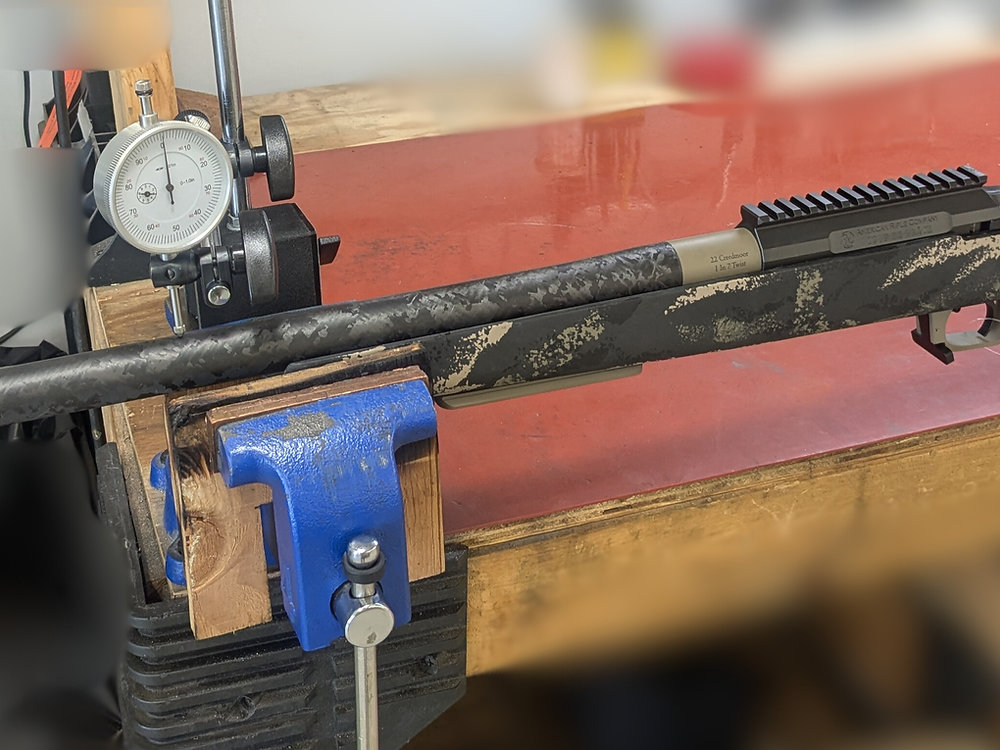
Measure the Bolt Play: Using a dial indicator, measure the bolt play at the rear bridge.
Check the Bolt Head and Rear of the Bolt: Ensure there's enough space for the bolt to move freely and be removed after the epoxy cures. If the bolt is too tight, it could get stuck in the receiver.
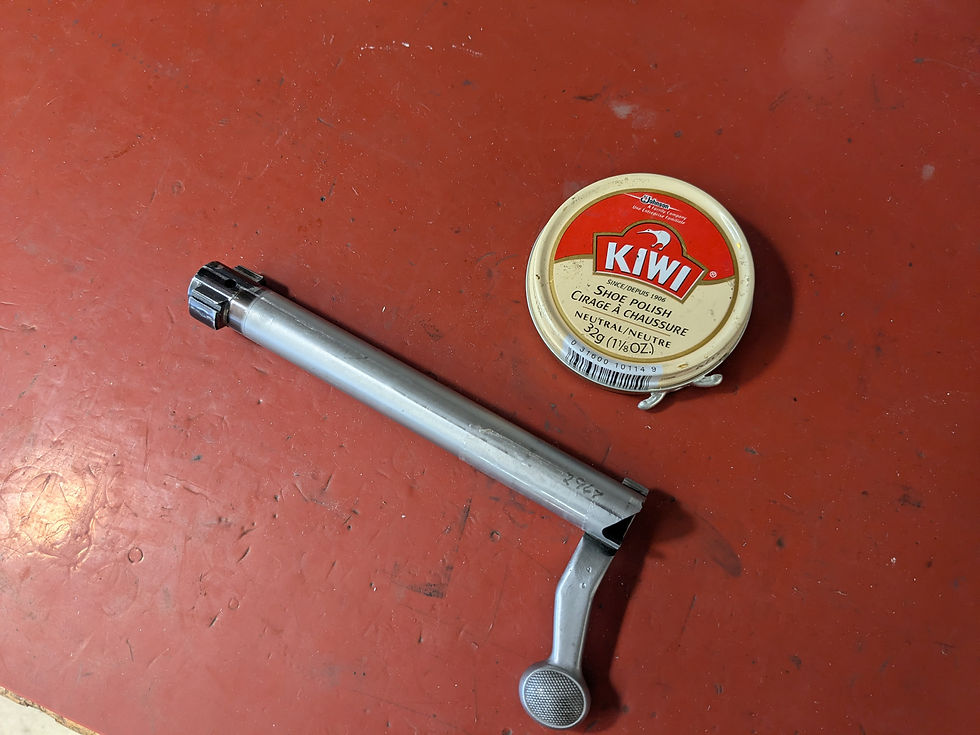
Apply Tape to the Bottom of the Bolt: To create a small gap, or "play," apply tape to the bottom of the bolt under the rear bridge. This allows the bolt to cycle smoothly after the epoxy hardens.
How to Measure Bolt Play at the Rear Bridge
Remove the trigger from the receiver, along with the striker and spring from the bolt.
Secure the bolt in a vise and attach a dial indicator on a magnetic base.
Place the dial indicator on the rear of the bolt, set it to zero, and gently move the bolt up and down to check for bolt play.
What the Numbers Looked Like on This Rifle
Without tape, we measure about .0115" of play between the bolt and receiver.
Adding .002" of tape reduces the play to .0095". This is the thickness of the epoxy after it’s applied.
For hunting rifles, you typically want around .004" to .005" of play. Adjust the fit by adding or removing layers of tape until you get the right clearance.
Bolt Measurements for Clearance
The rear of the bolt body measures .695", and the bolt head measures .692", giving you .003" of clearance (.695 minus .692 equals .003).
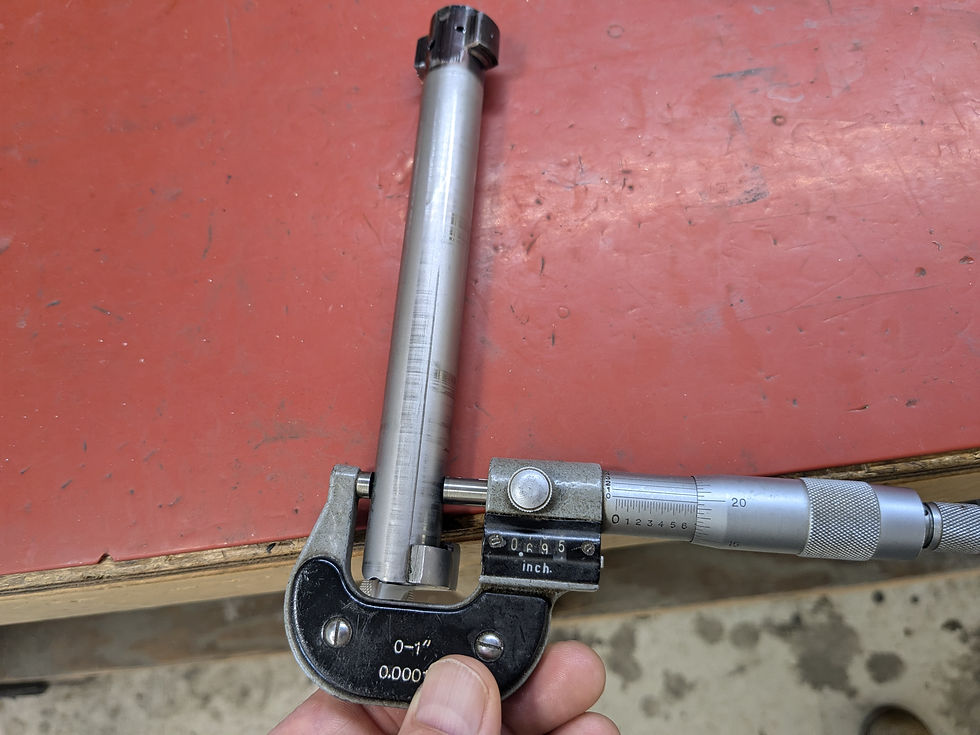
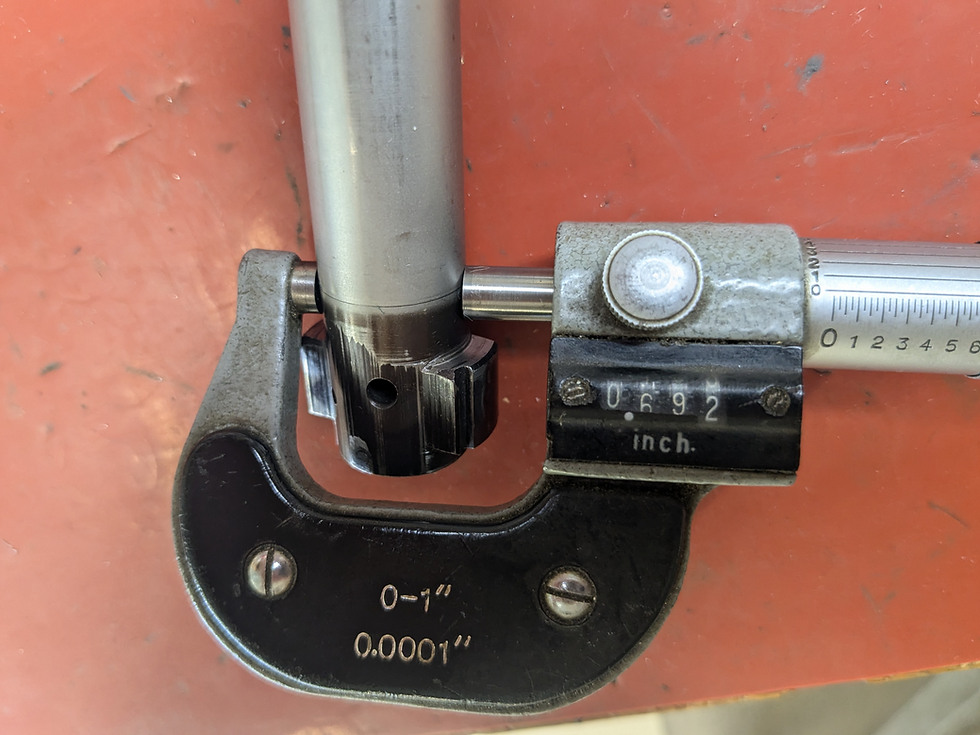
After adding tape to the rear of the bolt, the measurement increases to .697", providing .005" of clearance.

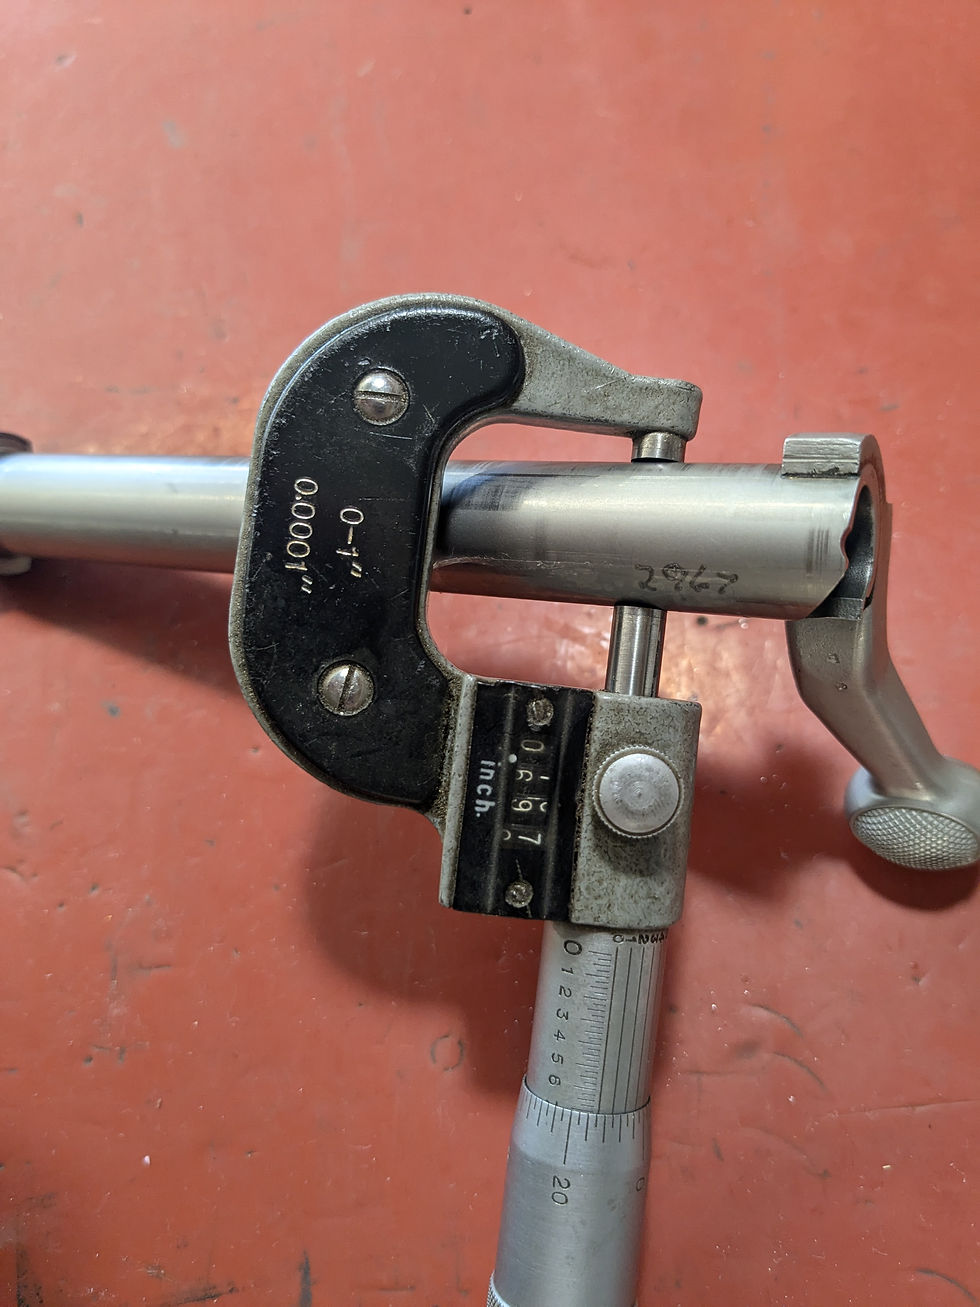
Note: If the bolt head is larger than the bolt body, add enough tape to ensure proper clearance for the bolt head to be removed from the receiver.

Step 2: Blast the Rear Bridge So the Epoxy Has Something to Hold
Once measurements are complete, roughen the inside of the receiver at the rear bridge using 150-grit aluminum oxide or 180-220 grit sandpaper. This ensures the epoxy bonds properly to the receiver. A smooth surface can prevent the epoxy from adhering securely.

Step 3: Degrease Everything, Including the Screw Threads
Degrease both the receiver and the bolt thoroughly to remove oil, dirt, or debris. This ensures a strong bond. Also, clean the scope screw threads and screws to prevent oil or thread locker from interfering with the epoxy bond.
Step 4: Wax the Bolt and the Base Screws
Apply wax to the bolt to prevent the epoxy from sticking to it. The wax acts as a release agent, ensuring the epoxy bonds only with the receiver. Wax the screw threads to allow easy removal after the epoxy has dried.

Step 5: Apply the Epoxy With the Bolt in the Receiver
Insert the bolt into the receiver with the tape and wax applied.
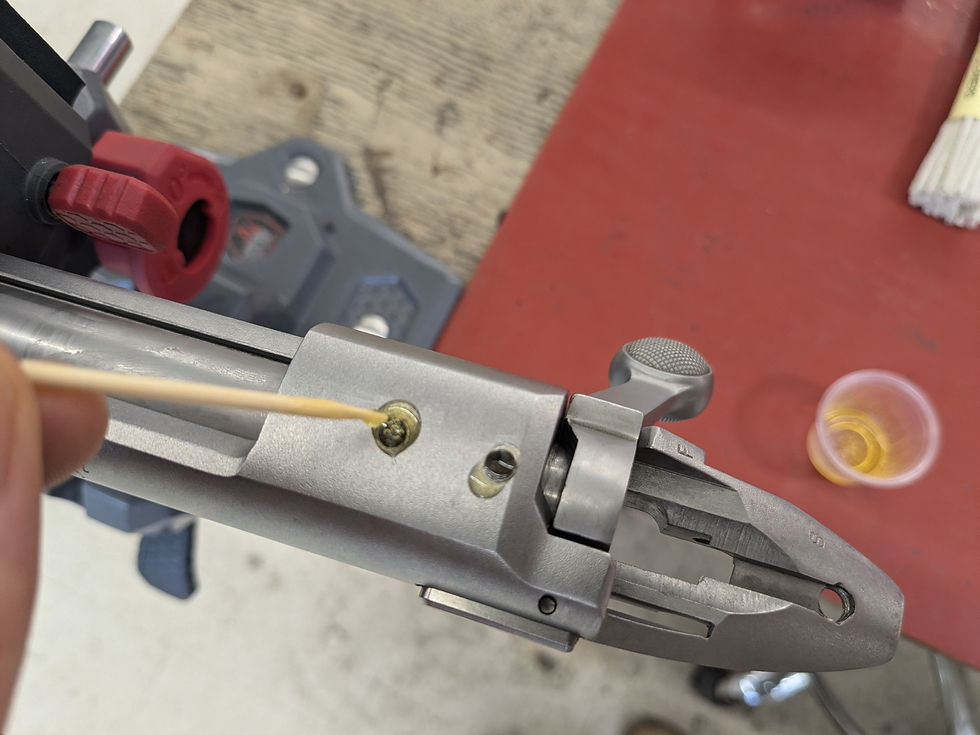
Apply the epoxy through the scope screw holes. Turn down the screws to press the epoxy between the receiver and bolt body.
Continue applying epoxy in the screw holes and turning the screws until epoxy leaks out of both the front and rear of the rear bridge.
Start with the front screw as it typically requires the most epoxy, and finish with the rear screw.

Step 6: Clean Up Before It Sets
Use cotton swabs and pipe cleaners to remove excess epoxy. Make sure to remove epoxy on the inside of the receiver.


Step 7: Cure, Then Break the Bolt Free
Allow the epoxy to fully cure with the bolt in place. Once cured, carefully remove the bolt. You may need to apply slight pressure to the bolt handle to break it free. If the bolt is stuck, use a nylon punch and hammer to gently tap it loose, avoiding damage to the bolt face or handle.
Once the bolt is removed, test it to ensure smooth cycling and proper fit. If the fit is too tight, light sanding on the epoxy can correct the issue.

A Five-Minute Check You Can Do Tonight
Unload the rifle and check it twice. Close the bolt on an empty chamber, then take hold of the bolt handle and try to move it up and down and side to side without turning it. On a tight action you will feel almost nothing. On a loose one you will feel it knock.
That knock is not proof you need sleeving, and you cannot put a number on it by feel. What it tells you is whether the bolt is a suspect worth measuring properly with an indicator before you start changing ammunition.

Why We Do This on Builds
At Redleg Company, our epoxy sleeving process is designed to enhance both the fit and accuracy of bolt-action Remington 700 type rifles. By carefully measuring and preparing the surfaces, applying wax for proper release, and ensuring the epoxy flows into the correct areas, we create rifles that feel custom-made and deliver exceptional performance.
When you choose Redleg Company for your custom build, you can be confident that each step has been meticulously executed to deliver the best possible performance, whether it's for competition or in the field.
Frequently Asked Questions
What is epoxy sleeving?
A thin layer of epoxy is bonded to the inside of the receiver's rear bridge so the bolt body runs against a surface cut to fit it, instead of rattling in a hole machined loose at the factory. The bolt is waxed so the epoxy sticks to the receiver only.
Does sleeving a bolt actually improve accuracy?
It removes a source of inconsistency rather than adding accuracy on its own. A bolt with over ten thousandths of play does not close the same way twice, and anything that does not repeat shows up on paper eventually.
Is this the same thing as bolt lapping?
No. Lapping makes both locking lugs bear evenly against the receiver, at the front of the action. Sleeving controls how the bolt body sits in the rear bridge. They fix different problems and a rifle can want both.
How much bolt play is normal on a factory action?
More than people expect. On the rifle in this article we measured about 0.0115 inch between bolt and receiver before any work. Factory tolerances are cut wide so every bolt fits every receiver on an assembly line.
How much clearance should be left after sleeving?
On a hunting rifle, about 0.004 to 0.005 inch. Tape on the bolt sets that gap before the epoxy goes in, and layers get added or removed until the number is right. Too tight and the bolt sticks after cure.
Will the bolt still cycle smoothly afterward?
That is the whole reason for the tape and the measuring. Done correctly the bolt cycles normally and just feels tighter and more deliberate. Done without clearance, the bolt is a permanent part of the receiver.
What if the bolt gets stuck after the epoxy cures?
Slight pressure on the handle usually breaks it free. If it does not, a nylon punch and light taps will, and a nylon punch is specified so the bolt face and handle are not damaged. If the fit is tight after removal, light sanding on the epoxy corrects it.
Can epoxy sleeving be undone?
The epoxy can be removed, though it is tedious work through the top of the receiver. Practically, treat it as permanent and get the clearance right before curing rather than planning to fix it afterward.
What epoxy do you use for sleeving?
A liquid bedding epoxy such as Acraglas. It has to flow, because it is being pushed in through the scope base screw holes and has to travel around the bolt body before it sets.
Why apply the epoxy through the scope base holes?
Because the bolt is already in the receiver holding the shape you want. Turning the base screws down pushes epoxy into the gap between the bolt body and the bridge, and you keep going until it appears at both ends of the bridge.
Does this work on actions other than a Remington 700?
The principle applies anywhere a bolt body runs in a receiver with more clearance than it needs. The method in this article is written around the 700 and 700 footprint actions, which is what most of our bench sees.
Is sleeving a substitute for buying a custom action?
No, and it is not meant to be. A custom action starts with the tolerances you are trying to create here. Sleeving is what makes a good factory action behave much closer to that for a fraction of the cost.
Does sleeving replace truing or blueprinting the action?
No. Blueprinting squares the receiver face, the threads and the lug abutments. Sleeving controls the bolt body in the bridge. On a serious build they are done together, and the order matters.
How long does the epoxy have to cure?
Follow the maker's time and leave it alone with the bolt in place until it is properly hard. The useful trick, as with any bedding job, is to keep the leftover mix beside the rifle. When the leftover is hard, so is the job.
How do I know if my bolt has too much play?
Pull the trigger and the firing pin assembly, clamp the bolt, set a dial indicator on the rear of the bolt and lift. Anything much past a few thousandths is worth a conversation. Ten thousandths or more is common and is what this job fixes.
Can I do this myself?
With a dial indicator, a micrometer, a way to blast or sand the bridge, and the discipline to measure before you mix anything, yes. The one mistake that ends the project is skipping the wax on the bolt.
Bring Us the Rifle, or Bring Us the Question
We sleeve bolts, lap lugs, true actions and bed rifles, and we measure every one of them before and after. If your rifle used to shoot and now it does not, our accuracy diagnostic is $150. We shoot it, measure it, and hand you a graded report with the price of every option before you decide anything.
Call Redleg Company at 507-677-6007, or bring it in. 430 Main Avenue, Chandler, Minnesota. Monday to Friday, 9 to 5. Full service list and current pricing at www.redlegguns.com/services-offered.


Take Your Reloading to the Next Level
Ready to improve your brass prep, shrink your groups, and make your precision rifle shoot like a laser? Download the Redleg Reloading Sheets and start keeping records that tell you something.

Disclaimer
The epoxy sleeving process discussed in this blog post is intended for informational purposes only and should be performed by experienced gunsmiths familiar with advanced firearm customization techniques. Modifying firearms can be dangerous if not done properly, and Redleg Company assumes no liability for any damages, injuries, or malfunctions that may result from attempting this process.
Proceed with Caution: Any modifications to a firearm, including epoxy sleeving, should be carried out with care. Always ensure that the firearm is unloaded and safe to handle before starting. If you are unsure or inexperienced with epoxy applications, firearm disassembly, or reassembly, it is highly recommended that you seek the services of a professional gunsmith. Improper modifications can lead to damage, malfunctions, or even serious injury.
Limitation of Liability: Redleg Company is not responsible for the improper execution of this process, misuse of tools or materials, or failure to adhere to safety standards. By attempting this process, you agree to assume all risks associated with the modification of your firearm. Redleg Company is not liable for any loss, damage, or injury, whether to property or persons, as a result of using the techniques or information presented here.
Compliance with Laws: Before modifying any firearm, ensure that your actions are in full compliance with all local, state, and federal laws. Redleg Company makes no guarantee regarding the legality or safety of the epoxy sleeving process for any specific application.
By following the steps described in this blog post, you acknowledge and accept full responsibility for the outcome of your work. Redleg Company provides this information "as-is" with no warranty or guarantee of success.


Comments