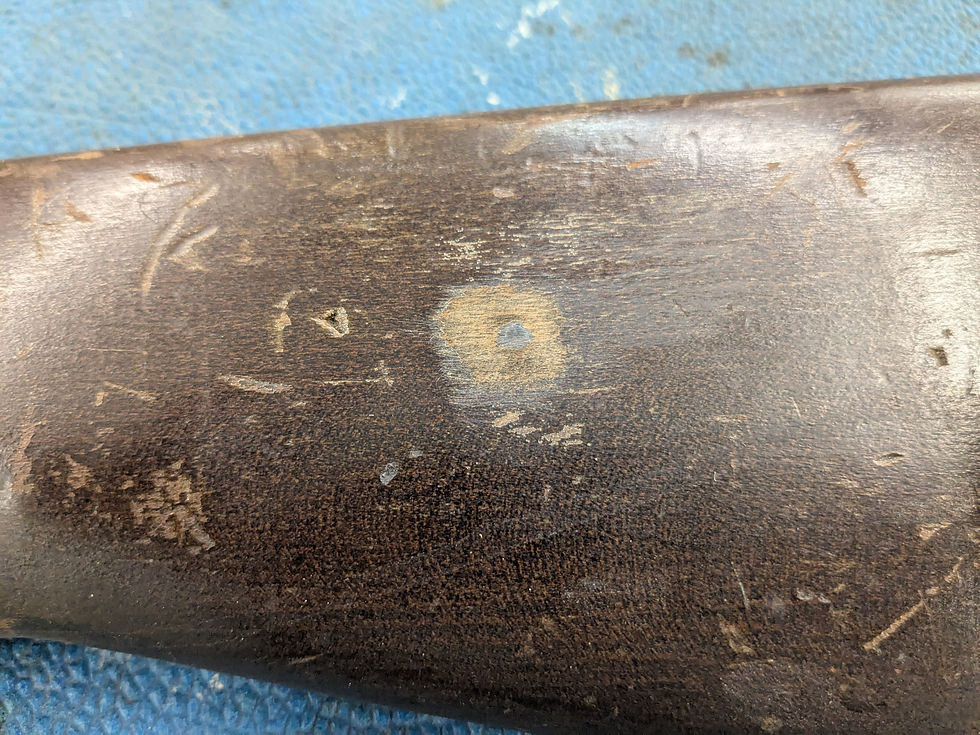
Fixing a Dent in a Stock with Clear Epoxy: Redleg’s Shop Method
- Red Leg Guns

- Apr 1, 2025
- 3 min read
Updated: Oct 22, 2025
Every rifle tells a story but not every ding or dent needs to be part of it. Whether it’s from a hunt, a bump in the safe, or just years of use, minor stock damage is something most gun owners will face. Luckily, there's a clean, effective fix that doesn’t require a full refinish: clear epoxy.
At Redleg Guns, we use a simple but reliable method that blends durability and appearance and yes, it includes a trick with painter’s tape that makes blending a breeze. Here’s how we do it.
🔧 What You’ll Need to start fixing stock dents with clear epoxy :
Two-part clear epoxy (we recommend AcraGlas)
Mixing stick and disposable container
Toothpicks or cotton swabs
Painter’s tape (blue tape works great)
Isopropyl alcohol (for cleaning)
220 and 400 grit sandpaper
Small sanding block or popsicle stick
Stock finish (Tru-Oil, tung oil, etc.) if needed for blending

🛠️ Redleg’s Step-by-Step Process:
1. Clean the Dent
Wipe the dented area with isopropyl alcohol to remove any oils, residue, or dirt. Let it dry fully epoxy sticks best to clean, dry surfaces.

2. Mix the Epoxy
Mix a small batch of clear epoxy according to the instructions. Use just enough to slightly overfill the dent.

3. Fill the Dent
Carefully apply the epoxy into the dent using a toothpick or small applicator. Slightly overfill the area don’t worry, the tape trick will take care of leveling.

4. Apply Tape Over the Epoxy
Right after filling, place a piece of painter’s tape directly over the epoxy. Lightly press it down so it flattens the surface flush with the surrounding stock. This helps shape the epoxy as it cures and reduces the amount of sanding needed later. Bend a corner of the tape over so that it is easier to get a hold of.

🔧 Redleg Tip: Don’t press too hard you’re looking for even contact, not squeezing the epoxy out.
5. Let It Cure
Let the epoxy cure fully under the tape. Dry time depends on the product typically 12–24 hours. Be patient rushing this part is where most DIY repairs go wrong.

6. Remove Tape and Blend the Repair
Once fully cured, peel off the tape. You’ll see a slightly raised or smooth patch of epoxy. Lightly sand the area flush using 220 grit, then smooth it with 400 grit to blend it cleanly with the stock. A small sanding block or popsicle stick helps control the area.

7. Touch Up the Finish (Optional)
If needed, apply a bit of finish to match the rest of the stock. A drop of Tru-Oil or your stock’s finish type will restore sheen and help blend the patch seamlessly.


🎯 Why We Use This Method
This fixing stock dents with clear epoxy trick helps reduce sanding time, keeps the repair neat, and gives a better finish with less fuss. It’s ideal for synthetic stocks or wood stocks where steaming out the dent isn’t an option due to broken finish.
We’ve used this method in the Redleg shop for years it’s clean, reliable, and holds up to field use.
🧰 Bonus Tips:
Use blue painter’s tape it comes off clean and won’t leave adhesive residue.
For stained wood, epoxy can be tinted to better match but test on scrap first.
If your stock has checkering, be very careful sanding near those edges. You may want to mask them off too.
Need a Pro Repair?
If the dent’s near checkering, in a critical fit area, or if you just want it done right the first time we’ve got your back. Redleg Guns offers professional stock repair and full restoration services. Whether you're local in Minnesota or shipping nationwide, we’ll get your rifle back in top shape.
🎯 Take the Next Step
Ready to improve your brass prep, shrink your groups, and make your precision rifle shoot like a laser?
👉 Download the Redleg Reloading Sheets Now Save time. Save money. Shoot better.
📞 Ready to Shoot Straighter?
We're not just building rifles, we're building better shooters.
✅ Reloading Classes✅ Custom Rifle Builds✅ Gunsmithing
📞 (507) 677-6007📧 info@redlegguns.com🌐 www.redlegguns.com


Comments